The Government of India’s National Portal for Rooftop Solar aims to simplify the process of installing solar panels on your home or business. This guide walks you through every step, from registering on the portal to commissioning your system and enjoying the benefits of clean energy.
Prerequisites:
- A stable internet connection
- Details of your electricity distribution company (DISCOM)
- Consumer number associated with your electricity bill
- Mobile phone number for OTP verification
- Roof ownership documents (if applicable)
Steps to Apply on the National Portal for Rooftop Solar
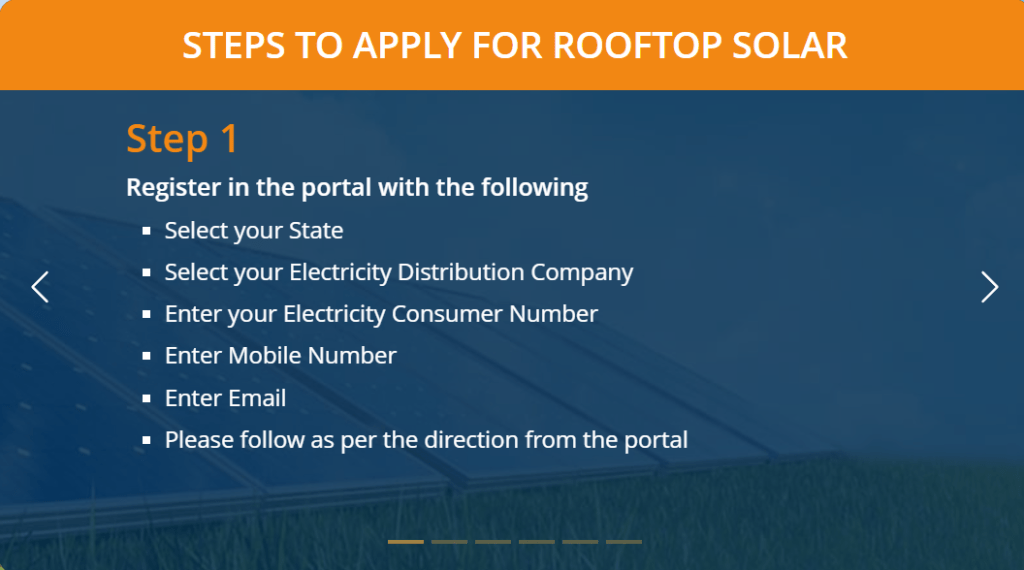
- Registration:
- Visit the official Rooftop Solar Scheme portal: https://urbansolar.com/residential-solar-panel-installation/
- Click on “New User Registration” and provide the required information.
- You’ll receive a One-Time Password (OTP) on your registered mobile number. Enter the OTP to verify your registration.
- Login and Project Details:
- Log in using your registered credentials.
- Click on “Apply for Rooftop Solar.”
- The portal will guide you through entering your project details, including:
- Consumer Category: Select “Residential” or “Commercial” based on your property type.
- DISCOM: Choose your electricity distribution company from the dropdown menu.
- Consumer Details: Enter your consumer number and other details as mentioned in your electricity bill.
- Sanctioned Load: This information can be found on your electricity bill.
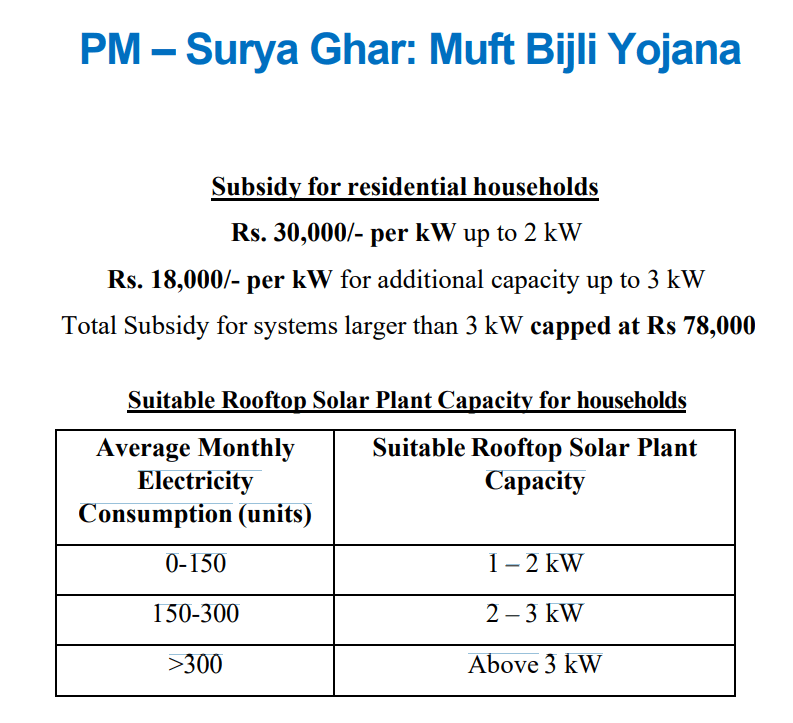
- Proposed Rooftop Solar Capacity: Carefully consider your electricity needs and choose a capacity that meets your hot water or power requirements.
- Rooftop Details:
- Provide details about your rooftop, including:
- Roof Area: Measure the usable area of your rooftop suitable for solar panel installation.
- Roof Type: Select the type of roof (flat, sloped, etc.) from the options provided.
- Shading Impact: Indicate if there are any obstructions like trees or buildings that might cast shadows on your rooftop.
- Provide details about your rooftop, including:
- Selection of Channel Partner:
- The portal allows you to choose a channel partner (solar power installer) from a pre-approved list.
- You can filter the list based on your location or request customized quotes from multiple vendors.
- System Specifications and Sanction Letter:
- After selecting a channel partner, the portal will display the proposed system specifications, including the number of solar panels, inverter capacity, and estimated electricity generation.
- Review these details carefully and confirm your project details.
- The DISCOM will then assess your application and issue a sanction letter if approved.
- Installation and Net Metering:
- The chosen channel partner will handle the installation process, following safety regulations and best practices.
- Net metering allows you to earn credits for excess electricity generated by your solar system and fed back to the grid.
- Your DISCOM will install a net meter to track energy consumption and generation.
- System Commissioning and Monitoring:
- Once the installation is complete and inspected by the DISCOM, your solar rooftop system will be commissioned, and you can start using clean solar energy.
- The National Portal offers a user dashboard to monitor your system’s performance, track energy generation, and manage your net metering credits.
Additional Tips:
- Rooftop Assessment: Consider getting a professional rooftop assessment to determine its suitability for solar panel installation and identify any potential challenges.
- Financial Incentives: Explore government subsidies and loan options available for rooftop solar installations in your state.
- Maintenance: Regularly clean your solar panels to optimize their efficiency and ensure a long lifespan for your system.
FAQs: National Portal for Rooftop Solar
Q. What types of buildings are eligible for rooftop solar through the portal?
A. Residential, commercial, government, non-profit, and educational institutions can all apply. There may be specific exclusions, so check the portal’s detailed eligibility criteria.
Q. Is there a minimum or maximum capacity for the solar system I can install?
A. The portal has no set minimum, but your electricity provider may have its own limitations. Maximum capacity limits are generally based on your current sanctioned load (from your electricity bill).
Q. How long does the entire process take, from application to commissioning?
A. Timelines can vary depending on DISCOMs and vendor workload. Ideally, the process should be completed within 30-60 days. Factors like complex roof design or monsoon season could cause delays.
Q: Are there any upfront costs or fees associated with applying through the portal?
A: Application on the portal itself is generally free. However, you’ll need to pay your chosen installation company for the system and installation costs.
Q. What if I’m not satisfied with the work of the channel partner I selected?
A. The portal should have a grievance redressal mechanism. Contact the portal’s support team for guidance. Document any issues thoroughly to strengthen your case.
Q. Can I get financing for my rooftop solar project?
A. Many banks offer loans specifically for rooftop solar installations. Check the portal and your local banks for their financing schemes and eligibility requirements.
Q. What happens if my solar system generates more electricity than I use?
A. Net metering allows you to earn credits for the excess energy you send back to the grid. These credits offset your future electricity bills.
Q. Do I need any approvals beyond DISCOM approval?
A. It depends. If you live in a housing society or apartment complex, they may have additional rules or approvals needed before installation.